In This Story:
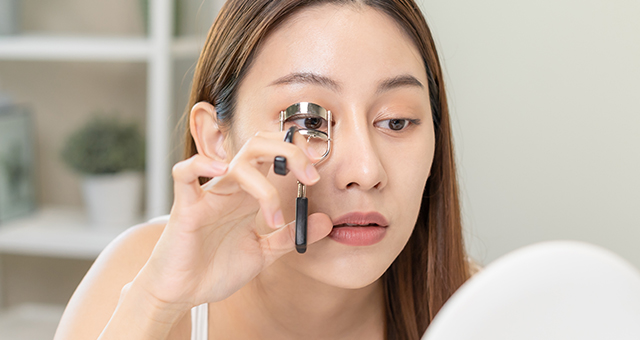
Let’s talk about a beauty essential that’s been saving lives – okay, maybe just saving lashes but that doesn’t mean we’re any less obsessed. Enter the humble yet very powerful eyelash curler. If by chance you were wondering how to use an eyelash curler without feeling like one's brandishing a medieval torture device, then do not worry as we have got it covered.
We have all played the game of false lashes, over-the-top mascara, or lash lifts that promise the best; nothing would ever come close to enhancing the natural beauty of your very own lashes. This is where the magic trick of a good lash curler happens. This simple tool may look threatening, but trust us, it's the secret ingredient leading to perfectly lifted and voluminous lashes. Still unsure "how to use a lash curler"? Think of it as a quick morning pick-me-up for your eyes: one simple squeeze and boom! Instantly wide-awake, fluttery lashes.
So for those wondering “eye curler how to use” without the dreaded lash mishaps then girl, it's all about technique. Always curl before mascara and never after, or you might incur a crimped, crunchy look (yikes!). If you're still asking, "How do I use an eyelash curler" without pinching, take it slow, pulsing gently from base to tips is how you go. Once you get the hang of using an eye curler, making up is a whole different game. New everyday essential right there because who has time for limp lashes?
How To Add A Lash Curler To Your Makeup Routine
You need to use an eyelash curler if you want wings for your lashes and if you have an innate love for beauty. Then this is a fun fashion journey that will equip you to slay this beauty game for good.
Step 1: Choosing Eyelash-Curling Weaponry
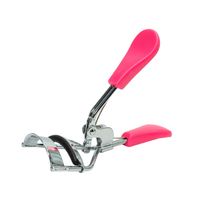
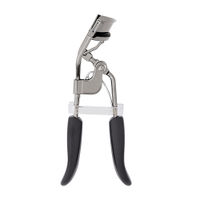
The first thing in eye-curler choices is fit. Choose one the width of your entire lash line so that all eyelashes will be taken care of. Choose one with flexible silicone rubber pads to prevent lash damage, and one with smooth edges to avoid pinching delicate eyelids.
Step 2: Preparation of Lashes
Before curling, check for cleanliness and dryness of lashes. Remnants of makeup will tend to cause clumping or, worse, the breaking of lashes. Feel free to heat your curler gently for a couple of seconds – your lashes will appreciate a little bit of spa time! Just make sure it's warm and not hot; we are going for glam, not the ouch.
Step 3: The Curling Technique
The moment you have anticipated; it is now time for the professional secrets of lash curling.
- Position: Now, open up the curler, and place the upper lashes right in between clamp, as close to the lash line as possible without pinching the skin.
- Clamping: Gently close the curler, and hold for 5 seconds. Remember, don't squeeze too hard; we are curling here, not crimping.
- Reposition: Shift the curler toward the tips of your lashes and gently press again for a natural-looking lift in the curl.
Step 4: Finish with the Holy Grail-Mascara
Immediately after curling, the use of mascara keeps the curl in place and gives volume. Wiggle the wand from the base of the lashes fully to the tips to cover them completely and separate them.
Extra Tips
Cleaning: Clean your curler regularly to avoid bacteria buildup. Change the silicone pads every one or two months for best use.
Safety First: Always curl before you apply mascara, or else your lashes will be glued together and will sustain damage.
An eyelash curler will change your beauty regime forever! All the envy of your eyelash fortune, achieved with minimal effort, will be yours. Next time you find the thought of "how do I use an eyelash curler without the fear factor?" a situation, reach for the curler and smile.
A 7-Step Guide to Curl Your Lashes Like a Pro
Pick the Right Eyelash Curler
The first step of the curling process involves identifying the perfect eyelash curler based on the quality of the lash pads, comfort of grip, and possibly the fit of the curve to your eye shape. If your lashes don’t fit into your curler at once, invest in a half-lash curler instead. Clean your tool with a makeup wipe or alcohol to eliminate residue or dirt.
Clean Your Lashes
A clean, dry face is a prerequisite to any beauty procedure – and the same goes for your eyelashes. While washing your face, gently cleanse your lashes to remove greasiness, makeup residue, or grime. Ensure you don’t tug at your hair or rub too aggressively, as you may pull the hair out.
Curl Your Lashes
Once you’ve cleaned the device and your lashes, it’s time you get down to business. Tilt your head slightly, open the eyelash curler, and lift the curler over your upper lash line. Ensure you get close enough to the lash line without pinching your skin. Shut the tool over your lashes and press gently. Pulse the tool over your eyelashes rather than holding it shut in place. Do not pull the tool, press down too hard, or pulse aggressively.
Use a Lash Primer
Once you’ve curled your eyelashes, turn to a quality primer to amplify the lash dimension and prepare the hair for mascara application. A thin layer to coat your lashes should be just enough. If you’re open to splurge, try Insight Cosmetics Stay Real Lash Mascara - Transparent or the e.l.f. Cosmetics Clear Brow & Lash Mascara - Clear. An inexpensive alternative would be Fae Beauty’s Brash Primer.
Apply a Volumising Mascara
Now that you’ve prepped your peepers, it’s time to go in with your favourite mascara. Begin at the base of your lashes, making your way to the ends in a curling motion. A few coats work, but avoid overdoing it, as it may undo the curling done previously. Opt for a lengthening or volumising waterproof mascara that enhances the density of your lashes.
Take note: volumising and lengthening aren’t terms used interchangeably; volumising mascaras are for those with sparse yet long lashes, while lengthening formulas are for those with fuller, albeit short lashes. Hence, be cognizant of this difference when making your pick. We recommend Sugar Pop’s Volumizing Mascara and Nudestix’s Lash Lengthening Mascara.
Comb Your Lashes
A crucial yet optional next step is to comb through your lashes to remove excess goop or mascara residue for a natural, feathery finish. Push through clumps and evenly distribute the mascara for more definition with The Vintage Cosmetic Company Brow and Lash Brush. If your lashes are short and aren’t curling despite all your efforts, consider these lash and brow serums to intensify growth.
Use a Heated Lash Curler
If you own a heated lash curler, now’s the time to put it to good use. A wand fitted with a rod that heats up, this beauty device can increase the longevity of your curled lashes, delivering intense volume and lift as compared to its traditional counterpart. Check out Panasonic’s Heated Eyelash Curler.
Nykaa Recommends:


Do You Curl Your Eyelashes Before Or After Mascara?
Ah, the eternal eyelash conundrum: to curl before or after mascara? The consensus among beauty aficionados is clear: curl first, then coat. Curl lashes before coating with mascara, not after, because using mascara can make your lashes brittle and has the potential to break due to the mascara hardening and stiffening the lashes.
Firstly, curl your lashes gently with a completely technical eyelash curler and place it very near the roots. Hold it for a couple of seconds to make a very natural lifted look. After curling, you can brush with your favourite mascara to give it extra volume and length. Letting curlers take their time to work also keeps them wavy, and that will give it the dramatic lift and duration effect.
Why Won’t My Lashes Stay Curled?
Oh, the elusive endeavour of achieving gravity-defying perfectly curled lashes for the whole day! If your lashes are undergoing a riot and aren't holding onto that sought-after curl, fret not. Let's dive into the secrets for changing those obstinately straight lashes into a flirtatious flutter.
The Right Tool for the Job
First, of course, is the eyelash curler. But don't say just any curler will do, dear. Go for the great stuff: one that is suited to the shape of your eyes. An eyelash curler that fits well allows every lash to be lifted into place without the terrible pinch. Just keep in mind: if the curler is too curved, its job will be made harder; if it is too flat, it will have no effect.
Master the Curling Technique
It all comes down to technique. Position the curler at the base of your lashes, ensuring it’s close to the lash line without catching your skin. Just press gently and hold for about 10 seconds; for extra bending action, move up with the curler halfway on the lashes and press again. This two-way movement will create a soft and naturally enduring curl.
Mascara Magic
The mascara you choose is essential. Go for the lighter, waterproof kind. Weightless formulas keep lashes from flattening with their curl, meaning the curl should stay en vogue all the way through that glamourous lunch date.
Heat It Up
Just like the curling iron for your hair, a little heat works wonders for your lashes. Try using a heated lash curler, or just warm your regular lash curler with a blow dryer for a few seconds. Just be sure it's warm and not hot so that you don't get into trouble. This extra warmth helps set the curl, giving your lashes a real power boost in the staying department.
(Lash) Health is Wealth
Curled lashes remain curled better if they are healthy. Make sure you wipe down your curler frequently to avoid any kind of dirt that might build up and mess up your work. Change your worn-out pads as needed. That'll guarantee unadulterated performance.
Consider a Lash Lift
If it feels like a chore every day to curl, a professional lash lift could very well be your answer. This semi-permanent treatment curls the lashes for weeks and keeps them looking lush and lifted. It's a stupendous option if maintenance-free glamour is on your agenda.
Key Takeaways
The lashes are the star of the show when it comes to a whole face of glam. With just the right tools, techniques, and the gentle touch of caring hands, you can finally be that girlie with the finest flirty fluttery lashes.
FAQs
-
Why don't my eyelashes hold a curl?
Several factors can cause eyelashes to resist curling, including their natural thickness and straightness, improper curling techniques, or using a curler that doesn't fit your eye shape. Additionally, applying water-based mascara can weigh lashes down, causing them to lose their curl. citeturn0search8
-
How can I improve my eyelash curling technique?
To enhance your lash curl, position the curler at the base of your lashes, ensuring it's close to the lash line without pinching the skin. Gently press and hold for about 10 seconds, then move the curler midway up the lashes and press again. This method creates a natural, lasting curl. citeturn0search1
-
Does mascara type affect how well my lashes stay curled?
Yes, the mascara you use significantly impacts curl retention. Opt for lightweight, waterproof formulas, as they are less likely to weigh down your lashes and help maintain the curl throughout the day. citeturn0search7
-
Can heated eyelash curlers improve the longevity of my lash curl?
Using a heated eyelash curler or gently warming your traditional curler with a blow dryer for a few seconds can enhance curl longevity. Ensure the curler is warm, not hot, to avoid damaging your lashes. citeturn0search3
-
What role does eyelash health play in maintaining a curl?
Healthy lashes are more likely to hold a curl. Regularly clean your eyelash curler to prevent residue buildup, which can hinder performance, and replace worn-out pads promptly to maintain optimal results. citeturn0search5