In This Story:
So, you have finally secured your dream wedding venue, finalised the guest list, booked your MUA, and picked up that bridal trousseau you have been obsessing over for months now (phew). The only thing left to do is to treat yourself to a relaxing spa day (adios stress) and choose a fabulous manicure to complement your look on your D-day; however, we aren’t talking about the run-of-the-mill nail polishes that you have worn every day of your life. Enter gorgeous bridal nail art that can be customised to match your ensemble and give you those perfect wedding nails; think stunning gold-traced tips, miniature floral designs, stylish glitter nails or even OTT embellished nails that are anything but basic. Looking for understated wedding nail art to suit your minimal sensibilities? Opt for elegant French manicures (with a twist), polished chrome nails or even a tiny tattoo-style text on each nail to make a statement.
Lucky for you, there are numerous bridal nail art designs out there, each tailor-made for every kinda bride. To make your life easier, we have rounded up some gorgeous wedding nail art that will match your different wedding looks and themes to a T.
How Long Before A Wedding Do You Get Nails Done?
Wondering how long before the big day you should get your nails done? Ideally, 1-2 days before the wedding is the best time to get your bridal nail art done. This would ensure that your nail designs for a wedding are fresh and impeccable and are less likely to chip. If you're getting intricate wedding nail art or extensions, planning ahead allows you enough time to perfect that look rather than hurrying the process. Also, it's one of the best times to treat yourself prior to the big day. So, book that appointment, sit back, and let your nails be as picture-perfect as your wedding day.
Top Bridal Nail Art Ideas
1. Bridal Nail Art for The Traditional Bride
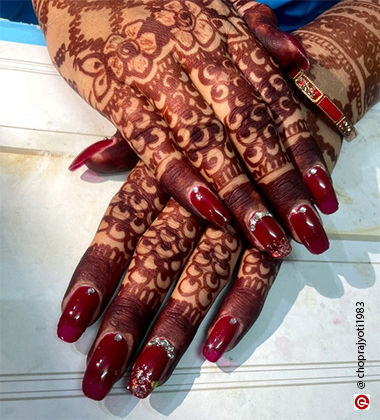
Go for the golden red manicure to feel like a million bucks. Going for these hues is also a plus point as they match your ensemble better than anything else. Feeling a little extra? Add the shine of rhinestones or coloured stones for that extra oomph. One thing about bridal nail art is that more is definitely less and therefore our pick is going for the nails that will make your evening sparkle like no other thanks to the dazzles and embellishments.
Follow these steps to get the perfect bridal nail art
Step 1: Start by applying two coats of Sally Hansen Hard As Nails Xtreme Wear Nail Color.
Step 2: Next, apply a small amount of Nykaa Cosmetics Nail Care Range to the nails where you like to place the embellishments. Use this: Nails&More Nla-19 Nail Art Stone Wheel and use a toothpick to secure the nail decorations in place.
Step 3: Finish off with a generous coat of O.P.I Top Coat.
2. Bridal Nail Art for The Minimalist Bride
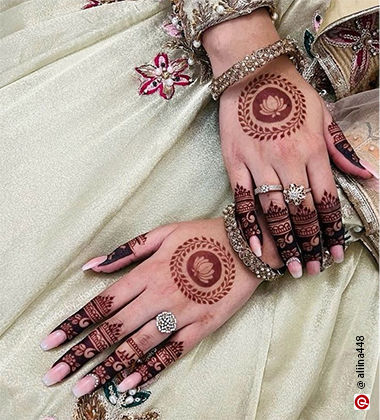
If elaborately bejewelled nails ain’t your style, then the classic French manicure is just what your beautician ordered. However, we recommend adding some pizazz to your wedding nail art, in the form of interesting elements such as some glitter or abstract brush strokes to make an understated statement.
Follow these steps to get the perfect bridal nail art
Step 1: Start by applying a coat of Renee Cosmetics Base Coat Nail Enamel on all your nails to even out the nail surface.
Step 2: Apply two thin coats of the neutral colour (subtle pink) on your entire nails. After it’s completely dry, place a thin strip of scotch tape on the area separating the tips. Paint your tips with the white nail paint; remove the strip when the nail paint dries. We love the Miss Claire French Manicure Kit With Acrylic Box that features a subtle pink and a bright white matte for the tips.
Step 3: Mix clear nail paint with the embellishment/glitter of your choice and coat the nails of your ring finger.
Step 4: Finish with a top coat of O.P.I Nature Strong Nail Paint Top Coat, running it along the edge of the tip to cap the nail as this will help prevent chipping. To extend the life of your French manicure, reapply a top coat every 2 to 3 days.
3. Bridal Nail Art for The Edgy Bride
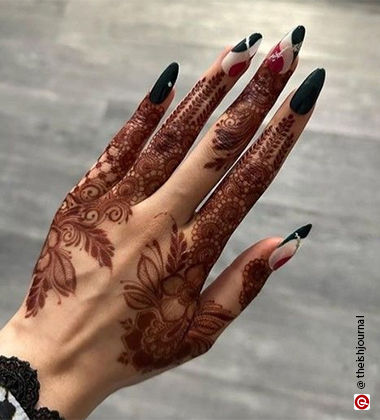
Love experimenting with new products and styles every day? Then we recommend opting for bridal nail art designs that mean something; think something bold, sparkly and stunning that emotes what you feel like. And well, lucky for you, you can customise these designs according to what your mood is. Currently, we are hearting tattoo-styled designs that are a perfect example of a ‘picture is worth a thousand words’.
Follow these steps to get the perfect bridal nail art
Step 1: Start by applying the Matra TINTED 3-in-1 Top & Base Coat Nail Strengthener Transparent Polish Paint Enamel Lacquer for an even application.
Step 2: Swipe on two coats of Nykaa Gold Rush Nail Lacquer - Champagne Gold 122 on all the nails.
Step 3: Using a thin brush make patterns of your choice with the Nykaa Black To Gold Nail Enamel Polish - Night Fever 229.
Step 4: Finish with a top coat of Nykaa Nail Care - Shine On Top Coat
4. Bridal Nail Art for The Princess Bride
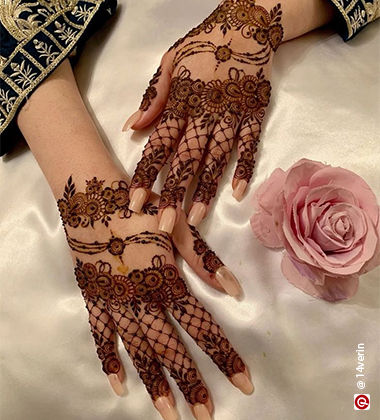
Wedding ensemble consists delicate tulles and is made out of soft pastels? Then the best bridal nail art to go for is the one that is equal parts soft and graceful. We suggest going for a nail art combination of pastel pink and gold that you can don at your wedding day.
Follow these steps to get the perfect bridal nail art
Step 1: Always start off with a base coat like the Nykaa Cosmetics Nail Care Kit -7-in-1 Nail Spa + Double Duty 2-in-1 - Top & Base Coat to make your manicure last longer.
Step 2: Next apply two coats of the Lakme Absolute Gel Stylist Nail Polish - Ivory Dust on every alternate finger, or as per your choice. Apply Nykaa Star Nail Enamel - 225 Boujee Rose Gold on the remaining fingers. Apply Swiss Beauty Stunning Nail Lacquer on the nail of the pinky finger.
Step 3: You can also create patterns with the three nail paints and some tape, that you can remove once your manicure has dried.
Step 4: Finish off with a coat of Miss Nails Gel Top Coat.
5. Bridal Nail Art For The “Pretty In Pink Brides”
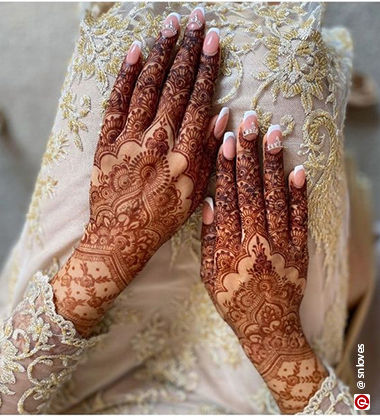
Step 1: First things first, arrange everything you need near you. You will need a base coat, two pinks of different shades like the Kay Beauty Nail Nourish Nail Enamel Polish and the Nykaa Breathable Nail Enamel - Easy Nude - 320, two makeup sponges, a top coat, and a touch-up small brush. Being prepared makes this so much easier.
Step 2: Start with freshly shaped clean nails. Apply a base coat such as the Lakme Absolute Gel Stylist for nail protection. Allow it to dry completely. This step is crucial in ensuring that your bridal nail art will last long throughout the wedding events!
Step 3: Take both pink polishes and place them side by side on a makeup sponge. Dip it a little in the middle by dragging it together. Place the sponge across your nails gently dabbing from the tip to the base. Do this as many times as you like it till you get a nice gradient. Move the excess polish around the cuticles by gently rubbing it with a small brush.
Step 4: Once you are satisfied with your ombre nails, top them off with a top coat for the shine and protection of your artwork. This will make your wedding nail art survive longer and look beautiful throughout the day. Now let everything dry and you are ready to flaunt your gorgeous bridal nail art!
6. Bridal Nail Art For The Chromatic Brides
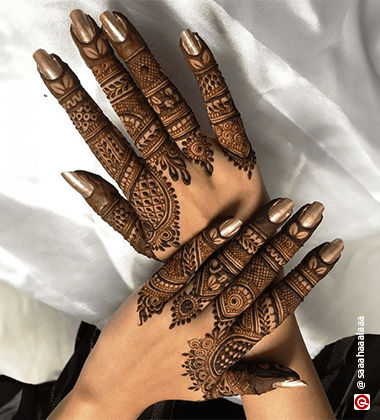
Step 1: First, clean and shape your nails, pushing those cuticles back gently. Work out the surface to get a good, smooth canvas. Then, apply a base coat, we recommend the Plum Color Affair 3-in-1 Strengthener, Base & Top Coat in an effort to protect your nails and ensure the polish sticks perfectly. This is an important step for any beautiful bridal nail art!
Step 2: Choose a bride-to-be-friendly shade that you think could carry your theme. Neutral shades like classic white, soft nude, or pastel work best like the LoveChild Masaba Nail Enamel The Classics. Paint two coats of your favourite polish to get an evenly even finish; let each coat completely dry before moving on.
Step 3: Wait till the base colour becomes dry and then do the chrome effect! Use a makeup sponge or even your fingertip with some gentle dabbing of the I AM EYECONIC Duo Chrome Pigments - Mood on your nails. Rub in a circular motion so that it gives you that shining mirror-like finish. Cover the entire nail for a flawless finish!
Step 4: Now, you just add on top coat to seal in that chrome and make them have a little shine. And then they're all set for the big day; let dry until hard. You will be left with beautiful, reflecting nails perfect for the bride!
Conclusion
Planning your bridal nail art is almost as exciting as picking the perfect wedding outfit. Your nails will be on full display at your wedding, so making sure you get the right nail designs for a wedding is crucial. You might choose classic French tips, dainty florals, or even glamorous chrome; your wedding nail art must complement your overall look for the wedding. Don't forget to place a little sparkle or something in it to make it pop. Your nails shine bright just like your special day, and perfect for close-ups of that stunning ring.
FAQs
-
How many days prior to my wedding should I get my bridal nail art?
Best time to get bridal nail art is 1-2 days before the wedding so you have fresh and perfect nails on your big day.
-
What are the most popular nail designs that one can opt for a wedding?
Classic French tips, soft ombrés, dainty florals, or glamorous chrome with glitter accents-well, those are just some of the most popular wedding nail designs.
-
Should my bridal nails match my wedding theme or dress?
While your wedding nails don't have to perfectly match, it's best to select colours and designs that harmonise with your dress, theme, or perhaps your bouquet for a really cohesive look.
-
For how long will my bridal nail art last?
Bridal nail art should last from one to two weeks, depending upon proper care, especially if you opt for gel polish or acrylics for your wedding nails.
-
Can I add gems, glitter, or other glitzy ad-ons to the nails?
Absolutely! Most brides add glitz and glamour to their nail art by using gems, pearls, or glitter. You can add a little personification to this fashion statement as a fun way of making it all yours.
