In This Story:
God bless the soul that created the first braid. History is proof that the ‘braided hairdo’, aka the queen of hairdos is not fading anytime soon. A few of us may have learned how to braid by the tenth grade, but the majority of us depended on our mothers’ dexterity with braids. Although you have always had a crush on lovely braids on other women from a distance, we know you are equally intimidated by the thought of attempting one with your own mane. Well, Aloha! We’ve been waiting for you to discover these easy braided hairstyles with not-so-intimidating DIY techniques. Did we just hear a silent yay?
We’ve curated some of the most stylish braided hairstyles for short, medium, and long hair. These hairstyles match varied style preferences and outfits that you can choose from for different occasions. Whether you want to wear a trendy co-ord or a traditional saree, there’s a braided hairstyle idea for you in this guide. Braided hairstyles are also protective and ensure your hair is not damaged by exposure to heat or pollutants. So, explore our favourite braided hairstyles from collarbone grazing to waist touching and find the right fit got your hair with this guide. Ready, Set, Braid!
Braided Hairstyles for Short Hair
1. Crown Crossover braid
Brace yourself to be the talk of the tress town!
Step 1: Apply Khadi Natural Herbal Hair Serum to smooth out any frizz and then part your hair in the centre.
Step 2: Take a thin section of hair from one side and create a classic three-strand braid. Secure with a hair tie.
Step 3: Repeat on the other side.
Step 4: Hold the two braids and crisscross them at the back of your head.
Step 5: Pin the braids underneath one another with the help of bobby pins.
Best Time: When your crush is attending the same event as you are. He will finally notice. (You will have to charm your way into his heart though, that’s still on you.)
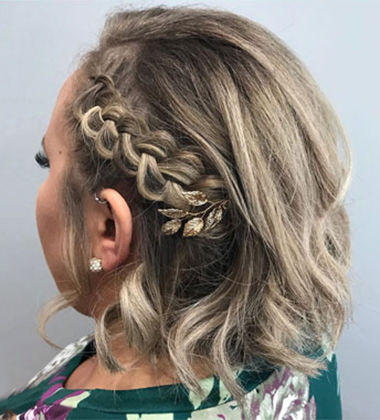
2. Simple Side Braid
There’s something so effortlessly royal about a simple side braid hairstyle. Try one and you will see.
Step 1: Create a crown Dutch braid with a two-inch section on one side.
Step 2: Secure it with an elastic once you reach the end.
Step 3: Pin the braid with a showstopper hair accessory. We recommend the glitzy Joker & Witch Gold plated metal leaves hair clip to add a pop of glam to your side braid.
Step 4: Brush the rest of your hair to freely fall on the braid for a graceful appeal.
Step 5: Spritz a strong hold hair mousse on the braid to ensure an all-day hold.
Best Time: When the success of your BFF’s bachelorette party rests on you and you have to look as LIT as the party.
3. Double Dutch braid
This easy-on-the-eye hairdo will keep the hair neatly packed away from the face.
Step 1: Brush your hair with The Body Shop Detangling Comb to ease out tangles before you begin.
Step 2: From the hairline, gather your tresses to start creating a braid.
Step 3: With each new stitch, add a thick section of hair from either side into your braid for a woven look.
Step 4: Continue till you reach the length of the hair and secure the braid with an elastic.
Step 5: Don’t forget to finish off with a few spritzes of Enzo White Hair Styling, Hard Hold & Set Spray to tame flyaways.
Best Time: Nothing beats a well-done Double Dutch braid for first dates or when you want to make an impression without the stress of open tresses.
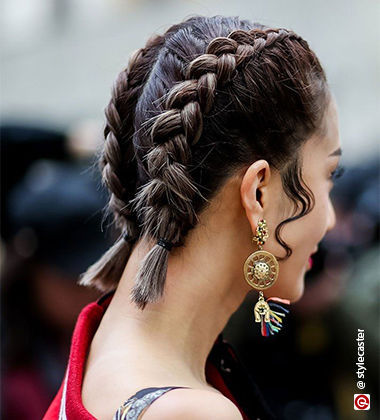
4. Double Crown Braids
Two braids at the crown create an edgy look and give the comfort of a ponytail while looking interesting.
Step 1: Part your hair in the middle.
Step 2: Create two sections and braid one side from the forehead to the neck.
Step 3: Secure the end of the braid with rubber bands.
Step 4: Repeat on the other side.
Step 5: Use a frizz control hair stick to tame flyaways.
Best Time: Wear with your bohemian-themed outfits.
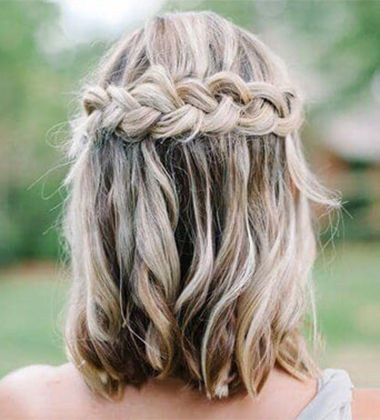
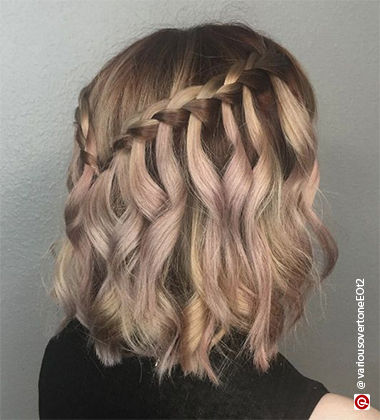
5. Waterfall Braids
Waterfall braids are the perfect combination of elegance and grace.
Step 1: Start with a regular braid at one side of your face.
Step 2: Drop a strand after each wave and add a new one in its place as you braid.
Step 3: Continue til you reach the centre of your head and secure the ends with bobby pins.
Step 4: Repeat on the other side.
Step 5: Lock it in with hairspray.
Best Time: Dates, picnics, or casual daytime events.
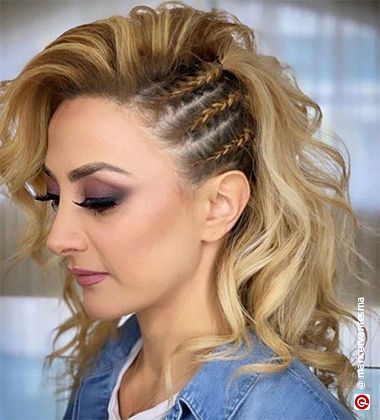
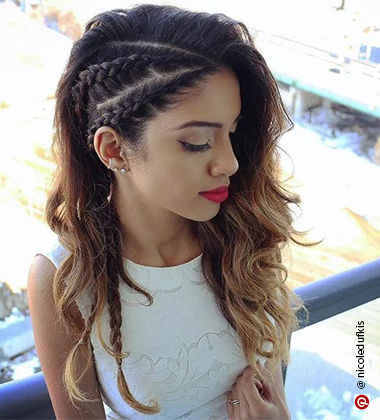
6. Multiple Side Braids
Get the grunge biker-girl aesthetic with thin braids that run along one side of the head.
Step 1: Part your hair to your preferred side.
Step 2: Section off small portions of hair on one side.
Step 3: Create multiple small braids that blend into the back of the head.
Step 4: Secure the ends of each braid with elastic bands.
Step 5: Leave the rest of the hair loose and use a textured spray to create an effortless look.
Best Time: With your concert looks or to add a bit of edge to your everyday outfits.
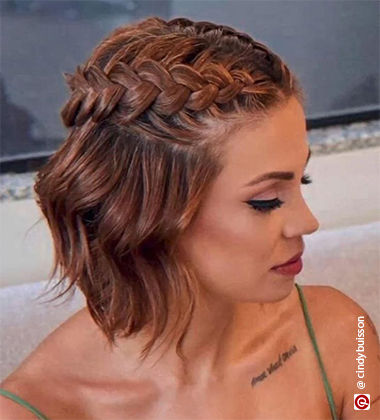
7. French Crown Braid
This French crown braid features a woven pattern at the top of your head for a sleek look.
Step 1: Part your hair in the middle and split it into two sections.
Step 2: Grab a small section of hair on one side and create a French braid till you reach the centre.
Step 3: Repeat on the other side.
Step 4: Secure the two ends in the middle with bobby pins.
Step 5: Fan out the braids to get a flatter, more defined look.
Best Time: For formal occasions and dinner parties.
Braided Hairstyles for Medium Hair
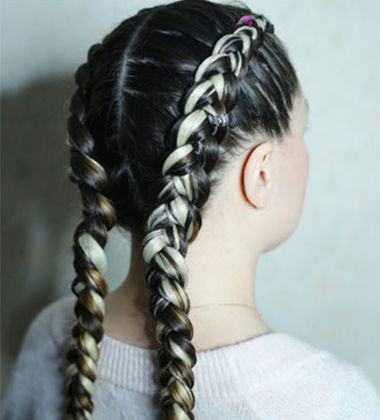
1. Boxer braids
This one exudes ‘sporty weekend’ vibes (for obvious reasons).
Step 1: Create a centre parting to divide your crown into two halves.
Step 2:Gather three sections at your hairline and alternately cross the left and right strands under the middle one.
Step 3: With each new stitch, add thin strands of hair into the braid from either side. When you reach the end of the length, secure it with an elastic.
Step 4: Repeat on the other half.
Step 5: Boxer braids would seem undone without a sleek finish. We would bet on the Osmo Blinding Shine Illuminating Finisher to impart that glossy shine to your uber-chic hairdo.
Best Time: When you don’t want tresses interfering with your Bench Press sessions at the gym. Enter Boxer braids.
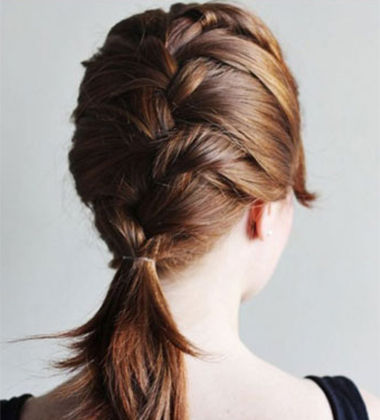
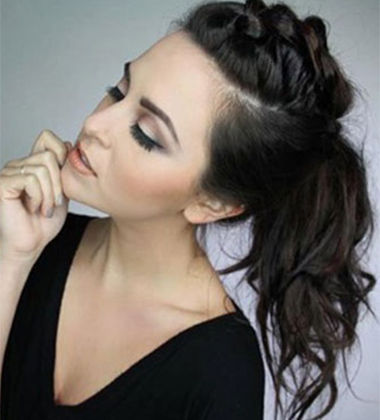
2. Crown Braid Ponytail
Disclaimer: You might have to deal with friends begging you to recreate this beauty on them.
Step 1: Pull together your crown hair to start creating a Dutch braid and stop at the centre of the back of your head.
Step 2: Now, gather all your hair to create a low ponytail. Secure it with an elastic.
Step 3: Take a thick section of hair from your ponytail and wrap it around the elastic.
Step 4: Pancake the braid by gently tugging at the sections to make it appear fuller.
Step 5: Go on a spritz fest with Schwarzkopf Taft Keratin Hair Spray Ultra Strong 4 to keep hair touch-ups off your mental to-do list.
Best Time: When you can foresee the nights on the dance floor slipping into hungover mornings.
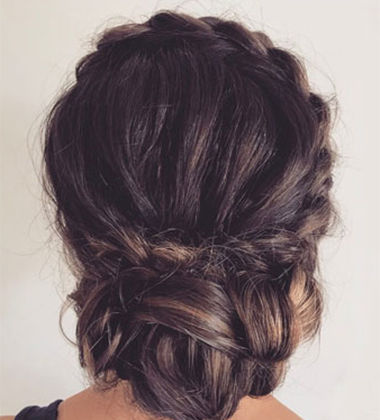
3. Milkmaid Braid
Can’t choose between a bun and a braid? How about both?
Step 1: Add some extra volume by backcombing the crown section using the Bronson Professional Termax Back Combing Teasing Brush.
Step 2: From the hairline, gather your tresses to start creating a braid.
Step 3: Wrap around the rest of the hair to create a bun below the braid.
Step 4: Pin the bun right under the crown braid so that it can be seen. If you have thick hair, U-shaped bobby pins can be your trustworthy bun saviour.
Step 5: Gently tug at the outer sections of the bun for a fuller and effortless look.
Best Time: Nothing beats a well-done Milkmaid Braid for first dates or when you want to make an impression without the stress of open tresses.
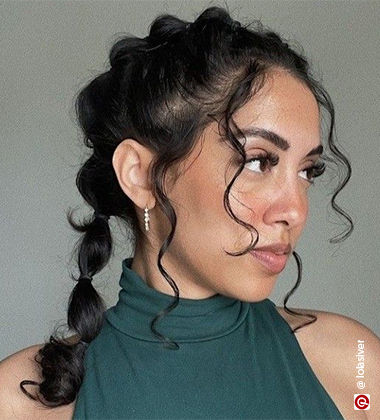
4. Bubble Braids
The playful bubble braids are perfect to show off your fun and youthful side.
Step 1: Pull up your hair in a high ponytail.
Step 2: Tie elastic bands in small intervals to create equal sections.
Step 3: Gently pull at each section to create ‘bubbles’.
Step 4: Take a small section of hair at the top of your head and create bubbles in intervals to meet the ponytail.
Step 5: Finger coils the front pieces to frame your face.
Best Time: Music festivals and fun outings with friends.
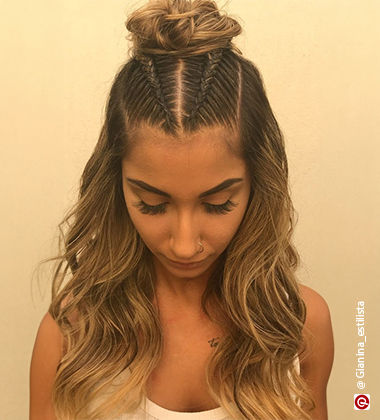
5. Braids With Man Bun
We love this style as the tiny braids merging into the man bun create an elegant yet rugged look.
Step 1: Section your hair into two parts. You can create more sections for an even more edgy look.
Step 2: Braid each section toward the crown.
Step 3: Gather the ends of the braid and the rest of your hair into a man bun.
Step 4: Secure with elastic bands or pins.
Step 5: Use a hairspray or cream for definition to get a polished look.
Best Time: Wear with your athleisure looks for treks, outdoor activities, or the gym.
6. Long Side Braids
The thick flowing long side braids are perfect to keep your hair open while being out of your face.
Step 1: Sweep your hair to one side.
Step 2: Create two sections parallel to each other on the shorter side.
Step 3: Braid the top section till you reach the tips of your hair and secure it with a rubber band.
Step 4: Repeat it in the other section.
Step 5: You can additionally add rings and accessories to the braids for a unique look.
Best Time: Beach weddings or with your ethnic festive outfits.
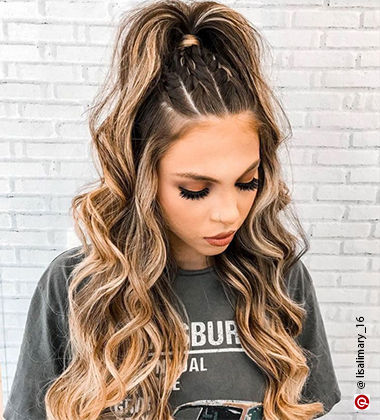
7. Braids With High Ponytail
These braids that lead to a high ponytail look sleek while being youthful and playful.
Step 1: Divide the top part of your hair into four even sections.
Step 2: Create a braid leading up to the centre of the crown.
Step 3: Repeat on the other three sides.
Step 4: Pull all your hair including the ends of your braids into a ponytail.
Step 5: Secure this with a rubber band. You can also take it one step ahead by wrapping a piece of hair around the base of the ponytail and securing it with a bobby pin at the base for a polished look.
Best Time: For casual, everyday looks or attending sporting events.
Braided Hairstyles for Long Hair
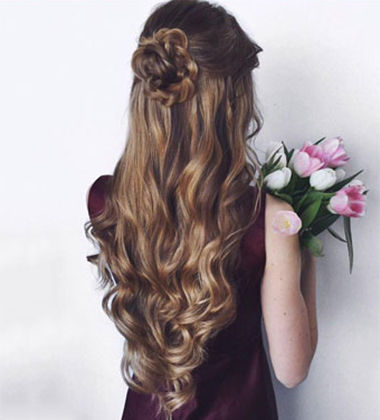
1. Flower braided half-up half-down
Take our word, we swear by this braided hairstyle to make you look as though you have just stepped right out of a fairy tale.
Step 1: Comb through your tresses in the crown area and gather them in a half-ponytail. Secure it with a hair tie.
Step 2: Now create a classic three-strand braid with the ponytail and secure it with a hair tie.
Step 3: Using both your hands, start rolling the braid from its length and pin it at the back of your head.
Step 4: Pancake the outer sections of the flower braid to create a petal effect.
Step 5: Since the rest of your hair stays open add some loose dramatic curls to your hair lengths by using the Bronson Professional Chopstick Hair Curler - Style Stick.
Best Time: When you don’t mind being the most talked about bridesmaid in a wedding whilst sensing hair envy all around.
2. French Braid
From here on, your love affair with French Braid will only grow stronger than ever.
Step 1: If your tresses are unruly, first prep them with the help of Vega Adore Flat Hair Straightener -VHSH-18.
Step 2: Divide the hair at your hairline into three sections.
Step 3: Alternately cross the left and right sections over the middle one to form a taut stitch.
Step 4: Continue till the end of the length and fasten your braid with an elastic.
Step 5: Finish off with a few spritzes of a hairspray for texture and volume and your French braid will be set to grab major style points in the tress town.
Best Time: When you have to attend that corporate meeting and are considering a ‘Don’t-mess-with-me’ hairdo.
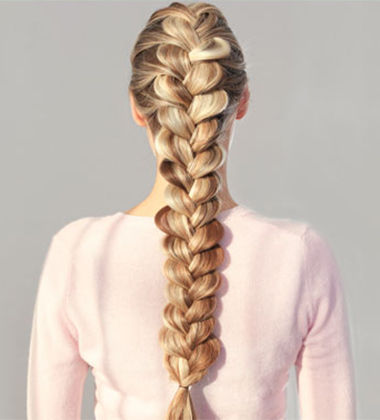
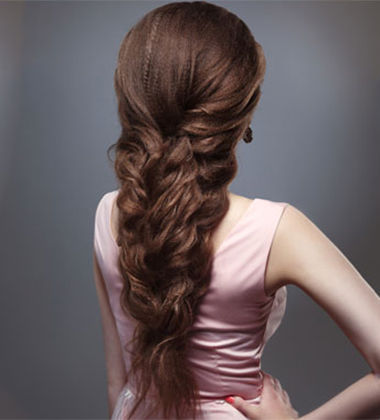
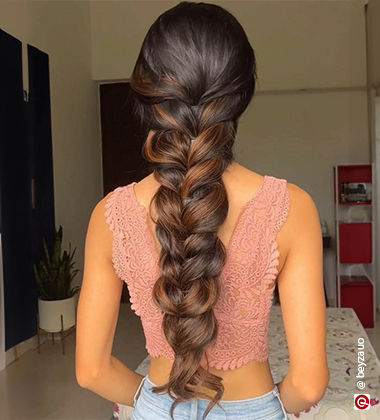
3. Mermaid Braid
A mermaid braid is a classic head-turner. Don’t let the intricate appearance of this hairdo deter you.
Step 1: Gather hair at the back of your head and divide it into three sections.
Step 2: Cross the left and right sections of hair over the middle section. Keep alternating.
Step 3: To make the braid appear woven, add a little hair from either side into your braid.
Step 4: Now here’s the critical bit. Pancake the braid by gently tugging at its outer sections to make it appear fuller.
Step 5: For a naturally relaxed look, leave the last bit of your hair free. Spritz the Compressed Micro Mist Invisible Hold Natural Finish Texture Hold Level 1 Hair Spray for a hairdo that stands the test of time.
Best Time: When you are craving gorgeous waist-grazing tresses that will make heads turn at that engagement party.
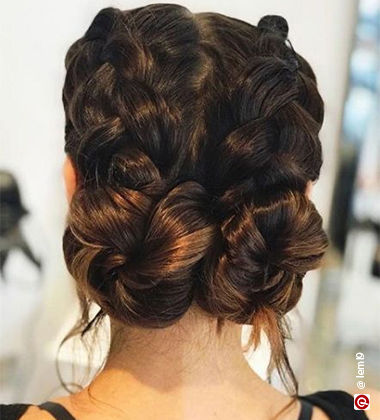
4. Braided Buns
Make use of your long hair to create this voluminous braided buns hairstyle.
Step 1: Part your hair into two sections.
Step 2: Begin French braiding your hair beginning at the forehead on one side.
Step 3: Once you reach the neck, twist the rest of the hair in a bun.
Step 4: Secure this with rubber bands or bobby pins depending on hair thickness.
Step 5: Repeat on the other side.
Best Time: Work events or formal parties.
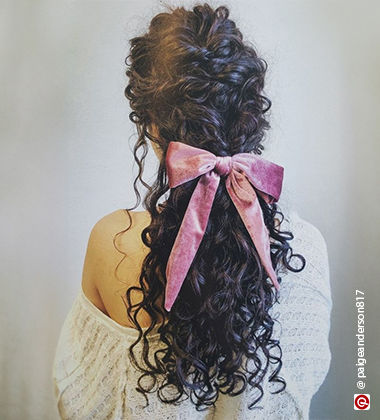
5. Loose Braids
The relaxed look of these braids adds a whimsical touch to your look. This braided hairstyle is great for those with textured wavy or curly hair.
Step 1: Start braiding your hair from the top without pulling too tightly.
Step 2: Braid till the ends and secure with an elastic.
Step 3: Leave a few strands loose at the front.
Step 4: Loosen the braid gently. Use hair mousse to create a tousled look.
Step 5: Finish it off with a bow or any hair accessory you love.
Best Time: Casual lunches or weekend brunch with the girls.
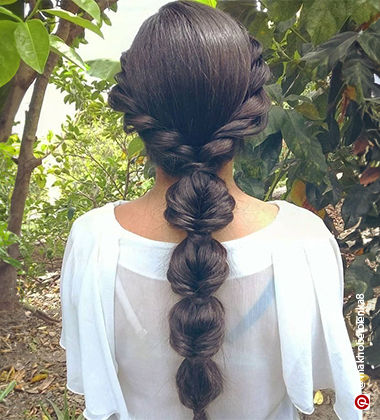
6. Exaggerated Braided Hairstyle
If you love being dramatic and bold, this oversized braided hairstyle is for you.
Step 1: Create bubble braids on each side of the hair and combine the ends in the middle at the back.
Step 2: Tie your hair in a ponytail.
Step 3: Create a large bubble braid section and secure it with a thin elastic band.
Step 4: Wrap a piece of your hair around the thin elastic band.
Step 5: Keep creating bubble braid sections and wrapping hair around elastic till you reach the end.
Best Time: For photoshoots or wearing whimsical gowns.
7. Overlapped Braid
This overlapped hairstyle creates the illusion of braids and is a stunning way to show off your thick, long hair.
Step 1: Take large sections of the hair on each side of the head and secure it with a bobby pin in the centre at the back.
Step 2: Overlap similarly sized sections from each side and secure with pins again.
Step 3: Keep overlapping sections of hair till you reach the end.
Step 4: Secure the end with a hair tie.
Step 5: Fan out each section to add more volume.
Best Time: For festive occasions with sarees, lehengas, and salwar suits.
Key Takeaways
Braided hairstyles can be created on varied hair lengths and are versatile enough to suit every occasion from formal to festive. From classic fishtail and crown braids to trendy bubble braids, there’s a braided hairstyle for every hair type, length, and texture. You will need to put in a bit of elbow grease and practice often to become a pro at braiding hair. Using styling products like gels and mousse aids in the creation of stunning, defined braids for beginners. Braided hairstyles also protect the hair and let you be free without worrying about your hair getting in your face.
FAQs
-
Can you braid short hair?
Yes, you can create several cute braided hairstyles with short hair including mini braids, crown braids, and side braids.
-
How do I stop braids from looking frizzy?
Use a styling gel, light-hold hairspray, or mousse to set the braid and maintain its definition.
-
How long can I keep braids?
You can keep your hair braided for up to 1 day. It is recommended to remove braids after 2 days to let the hair and scalp breathe.
-
Can braided hairstyles damage the hair?
Braided hairstyles actually protect the hair. However, ensure you braid your hair gently and don't pull on the roots.
-
How can you enhance braided hairstyles?
Use texturizing sprays, serums, and lightweight gels to add definition to braided hairstyles.

